VIRTUAL TOUR
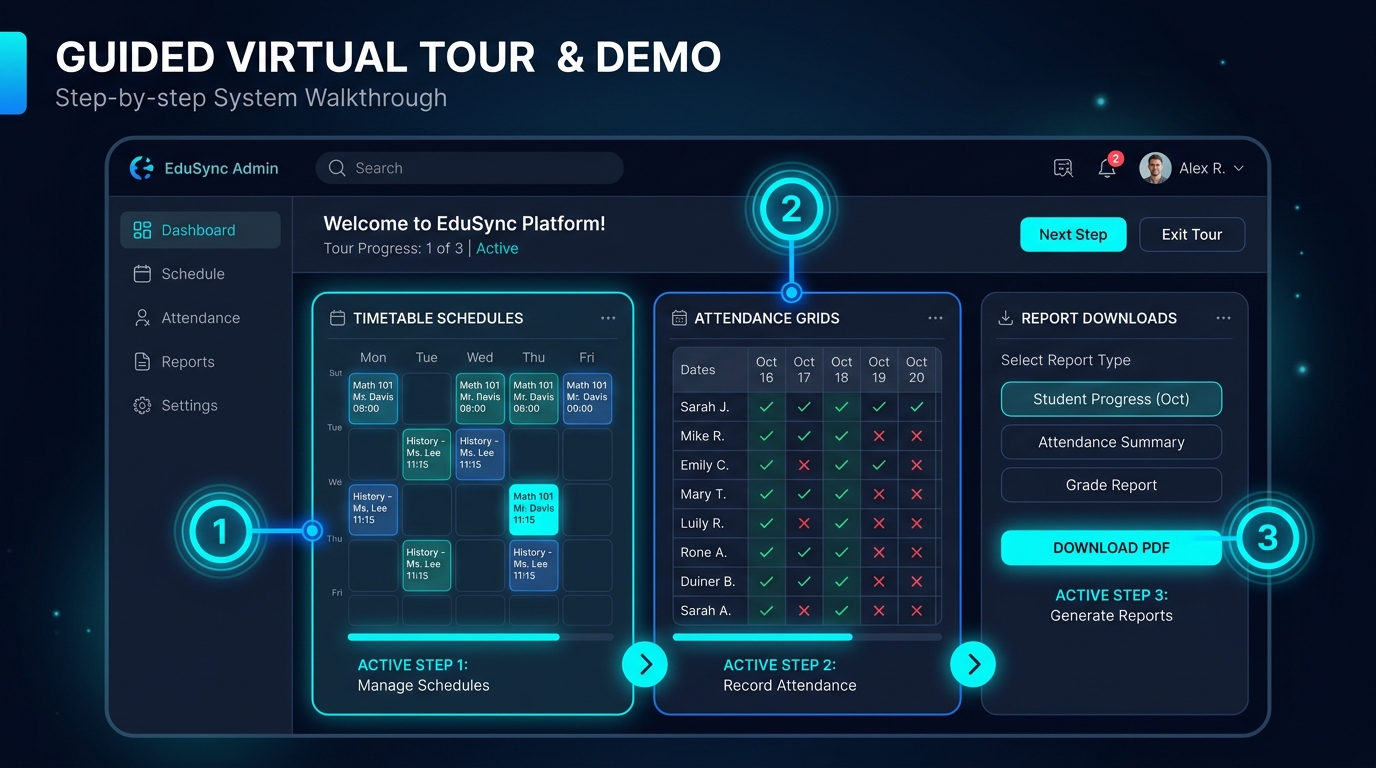
Guided System Walkthrough
See exactly how administrators, staff, and faculties operate the Attend Desk Web and Mobile systems.
See exactly how administrators, staff, and faculties operate the Attend Desk Web and Mobile systems.
The Institute Administrator logs in and configures the baseline academic parameters: creating departments, semesters, division segments, and active subjects. To populate student directories and faculty profiles, the administrator uses our bulk importer, uploading templates populated with lists of students in a single click.
The admin defines standard timetable slots (start and end times) for lectures and lab sessions. Faculty Assignments are then created, assigning subjects and divisions to specific teachers for specific days of the week. This sets up the automatic schedules visible to faculties.
Faculty members access their assigned classes dynamically. By logging into the Web Portal or the Flutter Mobile App, they select a schedule card and mark student statuses (Present, Absent, Late, Leave) in seconds. Duplicate attendance checks prevent accidental double submissions.
Once submitted, attendance is logged in real-time. Faculty can use the SMTP email notification center to send announcement templates to class rosters. Administrators can monitor live telemetry feeds, download consolidated monthly attendance grids in PDF/Excel, and secure SQLite database backups.
Sign up your institution and configure your digital attendance campus tracking in minutes.
Register Your Campus Now